Throw Key for Cars Guides
Walkthroughs for throwing farther, winning better cars, and growing your plot income.
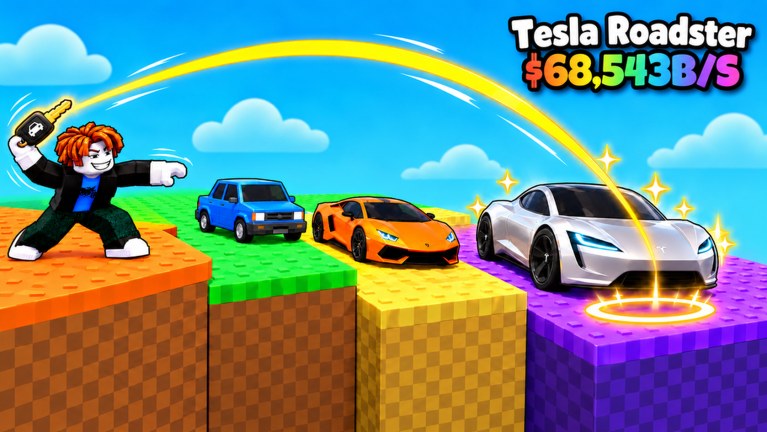
Welcome to the Throw Key for Cars guides hub. This Roblox simulation / tycoon from VEGA TRUTH (released 2026-10-29) is built around one addictive loop: throw a car key as far as you can, win the car from the zone where it lands, park that car on your plot for passive money, then buy stronger keys and train Throw Power so the next toss reaches rarer zones.
Servers hold up to five players. Peak sessions sit around nine thousand concurrent, with roughly 2.15 million visits and about 180k favorites, so you will often share a server while still having room to farm your own plot. Use this hub as the map for every walkthrough on the wiki.
Start here if you are new
If you just joined from the Roblox place page, begin with onboarding in this order:
- Beginner Tips — quick wins, common early mistakes, and what to buy first
- Getting Started — join, first throw, first car, plot parking, pull-up bars, and your first key upgrade
Those pages walk the first session so you do not waste early cash on the wrong upgrade path. Pair them with active codes when promo rewards are live, then skim controls so throws and plot interactions feel natural on keyboard or touch.
Core mechanic deep dives
Once the first car is parked, progress comes from systems that reinforce each other. Read them in this order when you feel stuck:
- Throw Power Guide — train on pull-up bars, understand why distance unlocks everything, and fix common training mistakes
- Zones Guide — how landing zones decide which car you win, how to push into farther bands, and how to farm a zone efficiently
- Plot Income Guide — how parked cars pay, when to replace fillers, and how income funds the next key or training spike
- Rare Cars Guide — better keys, zone targeting, and reinvesting plot income into legendary pulls
Throw Power is the soft skill gate. Zones are the reward table. Plot income and keys are the economy that feeds both. Skipping Throw Power while buying expensive keys usually stalls mid-game; skipping plot parking while chasing long throws starves your wallet. The guides above spell out the priority order for each stage.
How the loop fits together
- Equip your current key and throw toward the farthest zone you can reliably hit.
- Collect the car tied to that landing zone and drive or place it onto an open plot slot.
- Let parked cars generate money while you train Throw Power on pull-up bars.
- Spend surplus cash on the next key tier when it clearly improves zone reach or car rarity.
- Repeat into farther zones for rarer cars and higher plot income.
When you want ranked picks instead of prose, jump to the cars tier list and keys tier list. Those pages complement the rare-car and plot-income walkthroughs with investment priorities.
Suggested reading order by goal
First hour: Beginner Tips → Getting Started → Codes → Controls
Stuck on distance: Throw Power → Zones
Need more cash: Plot Income → Cars Tier List → Keys Tier List
Hunting rarity: Rare Cars → Cars Tier List → Keys Tier List
Session planning: skim Zones for which band to farm today, then Throw Power if your average throw falls short of that band, or Plot Income if pads are full of weak earners.
Tips that apply across every guide
- Park every car you keep. Empty plot slots are wasted income while you train.
- Train Throw Power in short, focused sessions between throws instead of ignoring bars until you soft-lock.
- Treat keys as zone tickets: buy the upgrade that lets you hit the next meaningful band, not every cosmetic step.
- Watch landing spots. A slightly shorter throw into a valuable zone beats a random overshoot into empty ground.
- Reinvest early money into power and keys before luxury purchases.
Stay current
The game updated as recently as 2026-11-16. Zone layouts, key shops, and car tables can shift with patches. After a big update, re-check Zones, Plot Income, and Rare Cars first, then confirm rankings on the tier list hub. Promo drops land on the codes page; patch context lives on Updates and November 16, 2026 Update.
Browse every guide below from the site navigation or the links on this page. Each article includes focused FAQs and cross-links so you can bounce between beginner tips, Throw Power, zones, plot income, and rare cars without losing the thread of the core loop.
Frequently Asked Questions
Quick answers to the most common Throw Key for Cars questions.
Which Throw Key for Cars guide should I read first?
Start with Beginner Tips and Getting Started for the first-session loop, then Throw Power if distance is limiting you, then Plot Income, Zones, and Rare Cars once parking is stable.
Do I need Throw Power before buying better keys?
Usually yes for the next zone band. A stronger key helps, but without Throw Power you still miss farther zones where rarer cars spawn.
Where do codes and tier lists fit with these guides?
Claim codes for free boosts, use guides for the loop, and use the cars and keys tier lists when you decide what to keep or buy next.
How many players share a server?
Servers cap at five players, so plot space stays manageable while you still see other throws and cars around the map.